

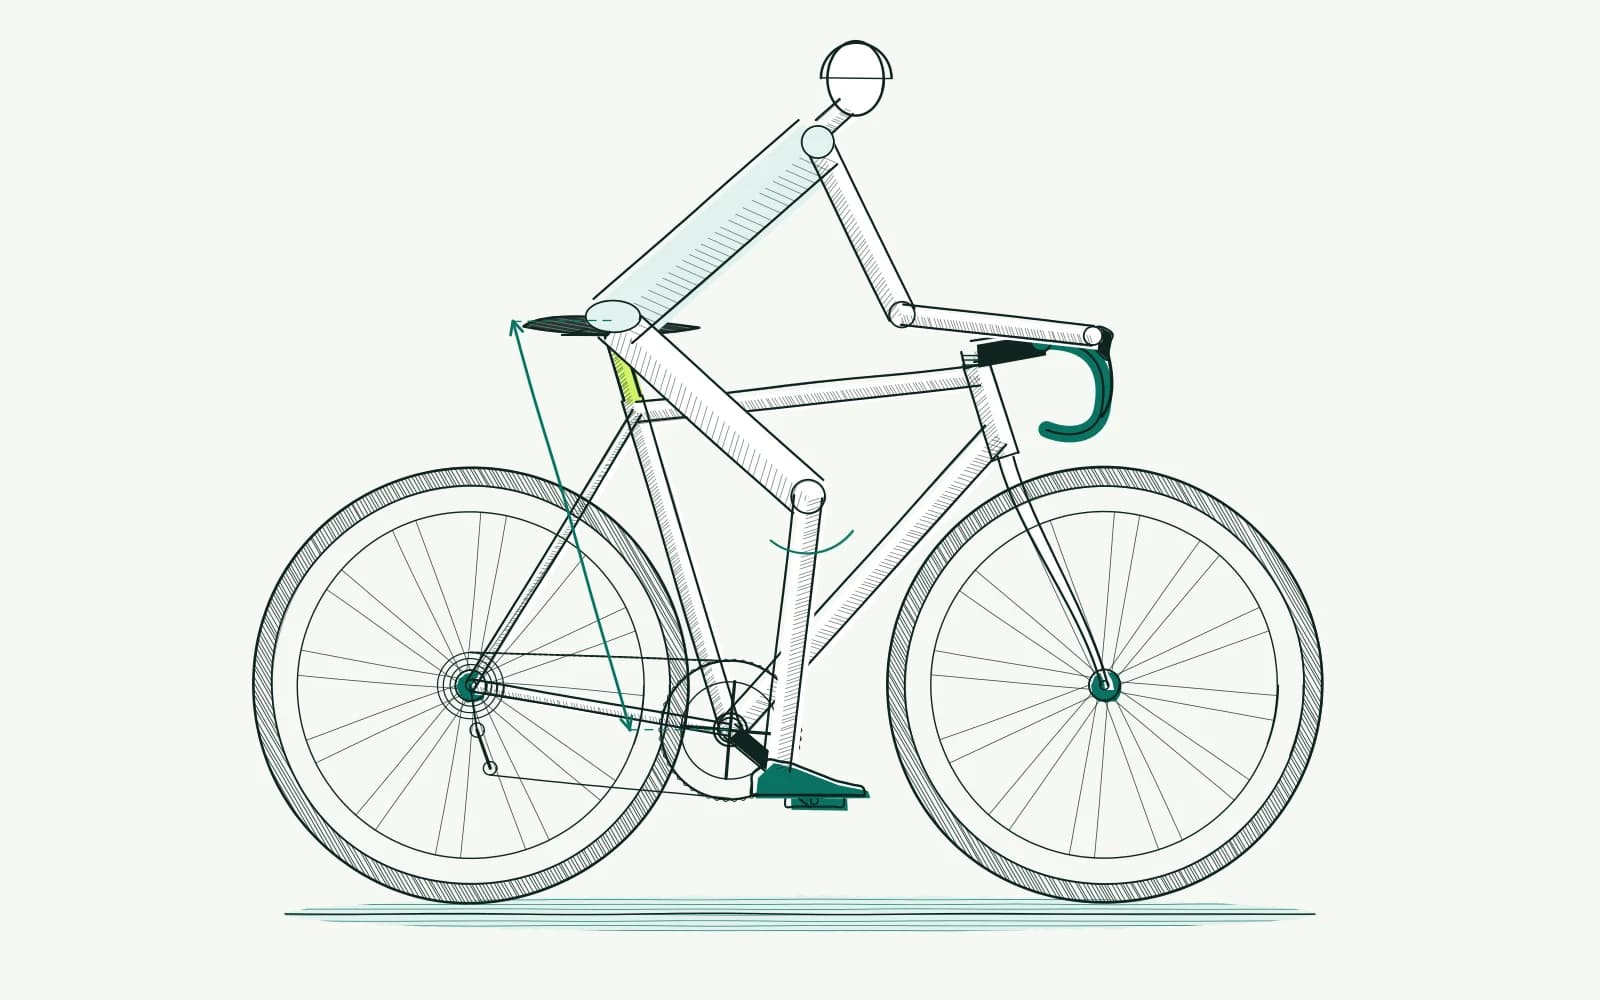
The problem: saddle height
You have a new bike, a different saddle or a seatpost lowered for transport. Now you are unsure which height felt comfortable. Perhaps your leg looks unusually straight or bent in a photograph.
That uncertainty is understandable. A marking on the seatpost does not directly describe how high you actually sit. Saddle shape and your measuring point change the result. Even two bikes with the same recorded number may feel different when shoes, pedals or cranks differ.
Some riders change height after every uncomfortable ride. That makes a useful starting point disappear. Without notes, it becomes difficult to link an effect to one particular adjustment.
Start by measuring and recording. This guide helps you compare a starting position rather than guess an ideal knee angle. If you already have pain or numbness, treat that as a separate question. A calculated height is not permission to keep riding with symptoms.
Background: why one measurement is not the whole answer
Saddle height helps determine the room your leg has while pedalling. Raising it increases the distance between saddle and pedal. Lowering it reduces that distance. You do not move like a rigid structure: your ankle, pelvis and sitting position also contribute.
Height works alongside other measurements. Setback changes where you sit relative to the bottom bracket. Crank length changes the circle travelled by your foot. Different shoes or pedals may place your foot closer to or further from the pedal axle.
An old saddle height therefore needs checking when you move to substantially different equipment.
A number based on inseam remains a starting point. The BestBikeFit4U calculator uses your inputs for an initial recommendation and comparison. It does not observe how you move during a long ride. Its illustration is schematic, not a measurement of your knee angle.
A photograph can help you compare changes, but camera position and the chosen moment of the pedal stroke affect it. A leg that looks straight in one picture does not prove the saddle needs lowering. Ask a fitter to assess your movement if uncertainty remains.
The measurement itself deserves attention too. Always measure to the same point on the saddle top, from the bottom bracket centre. Use the same bike position and hold the tape in the same way. A consistent method is more useful than comparing different methods as though their numbers were interchangeable.
How to approach it with bike fitting
-
Measure your body carefully: Measure inseam barefoot, with a book held squarely against your crotch and a tape alongside the wall. Ask someone to help keep the book horizontal. Repeat the measurement before entering an unexpectedly different result. Keep the measurement and method; a trouser size is not a substitute.
-
Record the bicycle: Hold the bike upright on a level surface. Measure from the bottom bracket centre to a recognisable point on the saddle top. Write down the height in millimetres and take a side photograph. Also record setback, saddle angle, shoes and pedals.
Mark the original seatpost position with removable tape without obscuring the minimum insertion marking.
-
Compare before adjusting: Enter your details in the saddle height calculator and check the units. Compare its output with your measured position. Do not automatically adopt a large difference in one movement. Check the inputs first and ask a fitter for help when the measurements are far apart.
-
Change one thing: Comparing a position 2–3 mm higher or lower is an example of a small step, not a personal correction. Do not choose the direction solely from pain location or a schematic illustration. Leave saddle angle and the clamp position on the rails alone. Follow component instructions, tightening torque and required insertion depth.
An inclined seatpost also moves the saddle slightly forward or backward when its height changes. Record that change without also sliding along the rails. Have a mechanic do the work if you do not understand the clamp.
-
Assess during easy rides: Compare the single change over two to three similar rides, only while you remain symptom-free. Use the same shoes and avoid adding a harder training schedule at the same time. Record saddle support, pedalling feel and repeated shifting around.
Restore the safely recorded original position if things worsen. A new position does not need defending simply because a calculator suggested it.
-
Stop when needed: Seek help for pain at rest or at night, swelling, radiating tingling or persistent numbness. Sudden severe knee pain, inability to bear weight, locking or a hot red knee with fever needs urgent medical assessment. If symptoms remain after three to four careful adjustments, involve a fitter and a clinician where appropriate. Do not wait for further experiments when warning signs appear; see NHS knee pain advice.
Further reading
- Knee pain when cycling: what can you check? helps you record symptoms and changes without diagnosing the problem yourself.
- Bike frame size puts your saddle height alongside the adjustment room provided by the frame.
- Bike fit and body proportions explains why overall height alone cannot fully describe your riding position.
- Cycling power and pacing helps you keep effort consistent and understandable during comparison rides.
- The saddle height calculator turns your measurements into a starting point to check on the bicycle.
Frequently asked questions
Can I measure from the floor?
That may seem convenient, but tyres and the bike's position affect the distance. For a repeatable saddle height, use the bottom bracket centre as your starting point. Record the point on the saddle too. Compare with an earlier measurement only when it was taken using the same method.
Should my heel be able to touch the pedal?
A heel check is at most a rough comparison, not proof that your setup is correct. Your normal foot position and shoes differ from that test. Do not use it to infer an exact number or a treatment for symptoms. A movement assessment may be needed if uncertainty remains.
Does the same height work with every saddle?
Not automatically. Another saddle may have a different shape and place you in a different sitting position. Record the old measurement and riding experience before changing it. Check height and support again, without changing every other setting at once or relying only on the mark on your seatpost.
What if the calculator gives a different height?
First check your inseam measurement, units and measuring point on the bicycle. A calculated result is not an instruction to abandon an old comfortable position immediately. Discuss a large difference with a fitter. Bring your measurement notes so the comparison uses the same reference points and assumptions.
This guide covers one part of your riding position. Read how bike fitting connects your measurements and bike setup.
Calculate a starting point from your measurements, then check it step by step on your bicycle.
Calculate your saddle height